3D Pixel Modeling: Getting the Low-Fidelity Look with Blender
Nov 30, 2025 (updated: 3 months ago)
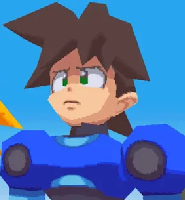
Demo is totally moveable and draggable, try to interact with it!
Before diving into the modelling, I wanted to pin down exactly what I was looking for. There’s a specific tension between "limited" (pixelart) and "limitless" (3d) that I wanted to explore. I wasn't just looking for a filter to put over a 3D model; I was looking for a cohesive visual language.
"I want to find an artstyle where the deep, retro-nostalgia of the 16-bit and 32-bit pixel art eras can truly collaborate with a 3D environment. It’s not about just sticking a sprite in a world - it’s about creating a space where the tactile, handmade feel of pixel pushing meets the depth, lighting, and perspective of a modern 3D engine."
A quick disclaimer: I am not a professional 3D artist, nor am I a game developer. I’m just a mere game enthusiast who is interested in this specific aesthetic. I’ve spent countless hours figuring out how to bridge the gap between 2D nostalgia and 3D depth, and I want to share exactly what I’ve learned. (this is not a tutorial)
Developing a True 3D Pixel Style (IMO)
In the 70s and 80s, pixel art was the only option due to the limitations of gaming devices. But for me, pixel art has its own dignity. Even with a limited palette of colors and dimensions, artists were able to create iconic characters and objects. I can't forget the experience of playing classics like Mario, Mega Man, Final Fantasy, or Zelda,
and seeing that influence continue into newer games like Terraria, Celeste, or Omori.
Today, hardware allows for advanced rendering like ray tracing and AR, making pixel art a deliberate choice of style rather than a necessity.
The "Gold Mine" of 3D Pixels
When 3D first arrived, most developers used the new computation power to move away from a pixelated look. They wanted to go bigger and smoother, using higher resolutions to hide the digital nature of the textures.
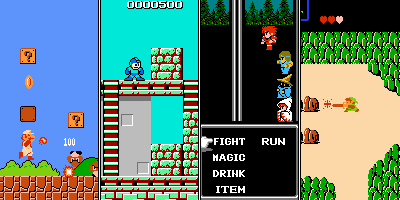
However, there was a specific era that found a perfect middle ground: the Nintendo DS. Because of its small screen and lack of texture filtering, the DS didn't blur its textures. Games like The Legend of Zelda: Phantom Hourglass, Dragon Quest IX, and the combat scenes in Mega Man Star Force created a "True 3D pixel" look.
They used real 3D geometry, but because the memory was so limited, the textures remained raw and "crunchy." It was a perfect 1:1 marriage of pixel grid and the 3D mesh.
Defining My "Sweet Spot"
To define the style I am working on, I look at two different benchmarks from these games:
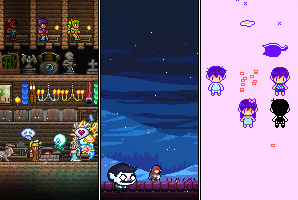
- Minecraft: This uses the low tenxel density I like (often 8x8 per face), but the geometry is restricted to blocky cubes. It lacks the silhouettes and expressive slopes of a real character model.
Texel density is the ratio between the number of pixels in a texture and the actual surface area of the 3d model it covers
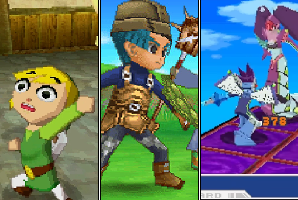
- Mega Man Legends: This uses 3D low-poly models, but the textures are generally 32x32 or higher. The goal here was to look as smooth as possible, mimicking a hand-drawn or anime style rather than embracing the pixel.
My Setting: The Low-Texel-Density Low-Poly Hybrid
I believe the perfect setting is a mix of these two ideas: Low-Poly modelling paired with an Low Texel Density (e.g., 8x8 texture density for the face dimension).
Many artists attempt to recreate this 3D pixel art style, but one is an undisputed expert: Brendan "Sully" Sullivan (@artofsully). His work is what really inspires me; it is incredibly clean and demonstrates exactly how "dignified" this style can look.

In his process, Sully uses Maya to create his pieces. However, since Maya is a high-priced industry standard, I wanted to achieve that same professional "True 3D Pixel" look using Blender. Because Blender is free and open-source, it's the perfect tool for indie developers and hobbyists to explore this aesthetic without a massive financial barrier.
Getting started
Because I’m approaching this as an enthusiast rather than a professional studio, I’ve kept my pipeline lean. The goal was to find tools that allow for precision and "pixel-perfect" control without unnecessary complexity.
- Blender (Modeling & Animation, free): Used for the entire 3D pipeline: building the low-poly geometry, rigging the characters, and creating the animations. It serves as the stage where all pieces come together.
- Aseprite (Texturing, paid*): The core of the "pixel" part of the art style. Aseprite is used to hand-paint every texture at a low resolution to ensure that the 16-bit aesthetic remains intact when mapped onto a 3D surface.
Self-compiling tip: For those on a budget, Aseprite is source-available on GitHub, meaning you can actually compile it yourself for free if you're comfortable with a bit of technical setup.
- Alternative Editors: While Aseprite is my favorite, this style is accessible through almost any raster tool. Software like GIMP or even this online tool Piskel works perfectly fine, as long as you can export a clean, uncompressed
.png.
Modelling
I started with the basics. If you are looking for a place to start, I highly recommend this Creating Stylized Low Poly Characters in Blender by lacruzo.
I suggest watching the video up until the Hair section, then stopping. We're going to do things differently here:
- Skip the Subdivision Surface Modifier: We aren't looking for smooth geometry. Adding a Subdivision Surface modifier just adds unnecessary faces that complicate your pixel grid.
In Blender, the Subdivision Surface modifier is a non-destructive tool that splits the faces of your mesh into smaller faces to make the object look smoother and more detailed.
- Use Planes for Hair extension: Instead of a solid "sculpted" hair mass, use simple 2D planes for the fringe, the back, and the ahoge.
- The Art is the Smoothing: We don't need high-poly counts for smoothness. All the anti-aliasing and dithering work happens in the texture. This keeps the model lightweight and gives it that authentic retro feel.
Pixel Units
The biggest mistake you can make in this style is ignoring your Texel Density while you model. If your geometry is random, your pixels will stretch or be cut.
To solve this, I mapped a linear meter to a specific pixel count. Actually, I learned the hard way for this Determine your scale BEFORE you start modelling. The Silly Me made that the mistake of modeling my character first and worrying about the scale later. I ended up with a bizarre scale where 1px=0.167m. Trying to snap vertices to a grid with a number like that is a total nightmare (not really I have a helper function using Python.)
To save your sanity, I suggest using a clean, linear conversion from the very first vertex: 0.1m=1px
Why this scale? (you might ask)
- The "Mental Math" Factor: This is the strongest reason to use 0.1m. If you want to move a vertex 3 pixels, you move it 0.3m. You don't need a calculator; you just move the decimal point.
- Default Camera Settings: At this scale, a character stays around 1.6m to 2.0m. If you used
1m=1px, your character would be 60 meters tall. At that size, you’d have to fight Blender to change the camera's clipping planes and light power just to see your model. At 0.1m, the default settings work perfectly.
T-Pose Setup
Once the scale is set, regardless of how messy it is. I started by blocking out the character in a T-pose.
Starting with the arms stretched straight out and the legs vertical isn't just a stylistic choice; it's a technical necessity for this specific workflow:
- Pixel-perfect Alignment: In a T-pose, your limbs run parallel to the world axes. This makes it much easier to align your faces to your pixel grid. If you model a character with arms at their sides (A-pose), you're fighting diagonal lines from the very first vertex. which leads to messy textures.
- The Mirror Shortcut: By using a Mirror Modifier, I only had to focus on one half of the body, This ensures the character is perfectly symmetrical, which is vital when you're trying to keep your UV map organized and your pixel density consistent on both sides.
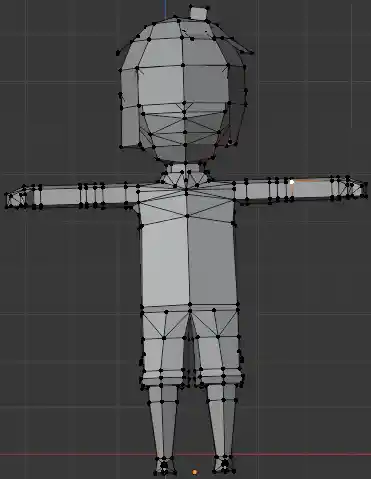
This model has no mirror modifier as I have applied the modifier. The hair is not symmetric since modified it to fit my sprite.
Struggle with the Body
Modelling for a pixel-art aesthetic requires a complete shift in how we think about topology. Standard "smooth" modelling techniques often backfire when downsampled.
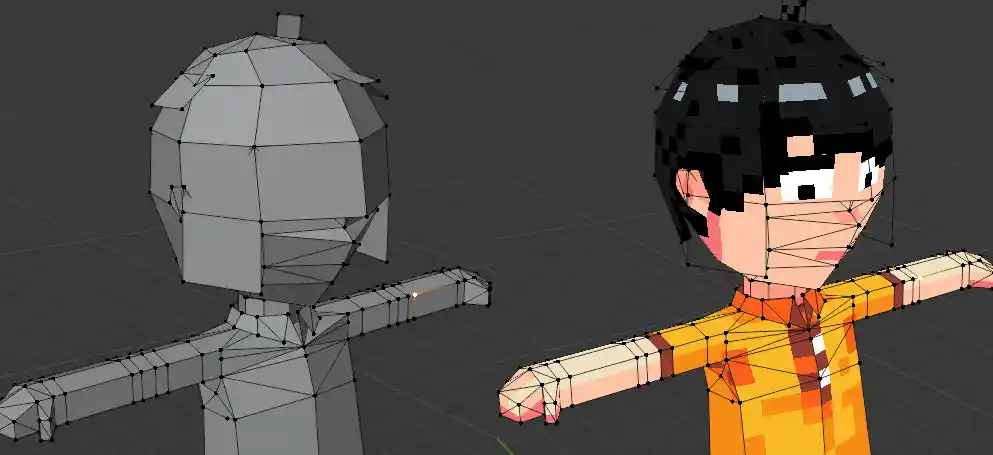
The Thumb-Plus-Block Hand
Hands were the hardest part to balance because they easily fall into that sub-pixel trap. Because the 3D geometry exists in a high-resolution space but the texture is a low-resolution grid, the mesh edges do not align with the pixel boundaries. In this style, if a detail isn't thick enough to "own" at least one full pixel, it shouldn't be there.
If you model five realistic, thin fingers, they become significantly thinner than a single pixel. They fall into the sub-pixel trap where the edges of the mesh don't align with the texture grid. The engine can't decide where to draw them, so they just jitter and shimmer. It looks like broken noise.
If you try to give each of those five fingers at least one full pixel of width so they "read" clearly, the hand becomes massive. You simply don't have enough space on a low-poly character's arm to fit five individual 1-pixel-wide columns plus the gaps between them. It would look bloated and "weird."
The Fix: The Mitten Approach: Instead of five distinct fingers, model the hand as a single rectangular block with one separate block for the thumb. This ensures the hand remains a solid, flicker-free shape.

Rounded Arm Problem (minor)
Usually, artist try to make limbs look as cylindrical as possible. However, for this style, rounded arms didn't work well for me. Below are two arms representing the styles I’ve tested. The first is a small, rounded arm, while the other is flatter and wider. Both have their merits, but the flatter version fits the model's aesthetic much better.
Here is why the flat arm is the better choice for me for this specific look:
| Feature | Rounded Arm | Flat Arm |
|---|---|---|
| Visual Style | Anatomically traditional. | Blocky and stylized. |
| Aesthetic Fit | Feels clashing with the flat hand. | Matches the mitten hand's geometric logic. |
| Readability | High; taper clearly defines the wrist. | Moderate; can look "flat" from certain angles. |
| Texture Quality | Risk of "pixel swimming" on curves. | Good; preserves 1:1 texel integrity. |
| Overall Feel | Small and realistic. | Bigger, heavier, and more deliberate. |
Why the Flat Arm Wins Geometric Harmony: The rectangular shape acts as a natural extension of the "mitten" hand, making the limb feel like a deliberate part of the grid-based design.
Texel Clarity: Flat surfaces ensure every pixel on your texture remains a perfect square, avoiding the "pixel swimming" that happens on curved meshes.
Readability vs. Banding: While the rounded arm has better anatomical definition, the small surface area can cause unwanted color banding as the engine tries to resolve gradients across a tiny, curved pixel grid. The flatter arm provides a larger, cleaner canvas that avoids this jitter.
Banding occurs when a color gradient lacks enough shades to appear smooth, forcing colors into distinct, jagged steps or stripes. The left sphere shows obvious color banding with wide, solid orange rings and harsh steps. The right sphere fixes it by narrowing the transition bands and adding subtle anti-aliasing pixels, creating smoother, more natural shading.
UV Editing
Once your model is complete (or even while you are still shaping it), you need to define its surface. This process involves creating a material and mapping your pixel art to the 3D geometry.
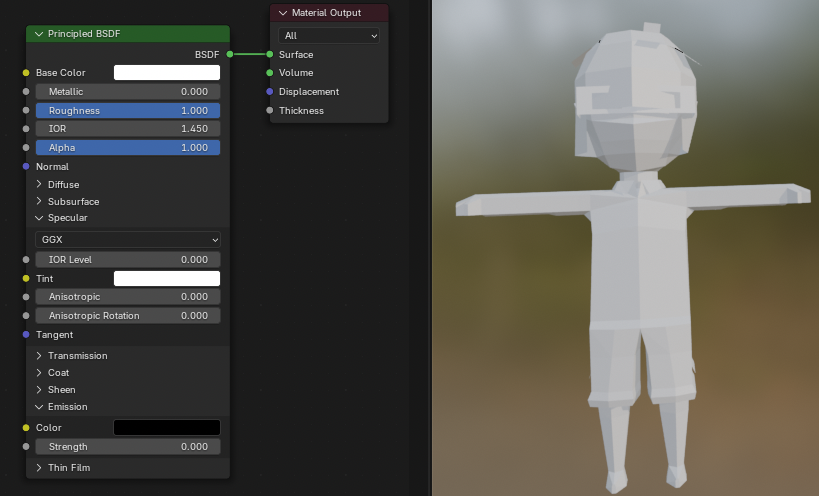
Setting Up the Material
In the Properties Panel, navigate to Material Properties, click New, and give your material a name. Next, switch to the Shading Tab. This workspace is where you define the visual logic of your model using "nodes." By default, you will see:
- Principled BSDF: An all-in-one shader that handles how light interacts with a surface (reflections, transparency, etc.).
- Material Output: The final "plug" that tells Blender to actually render the results on your object.
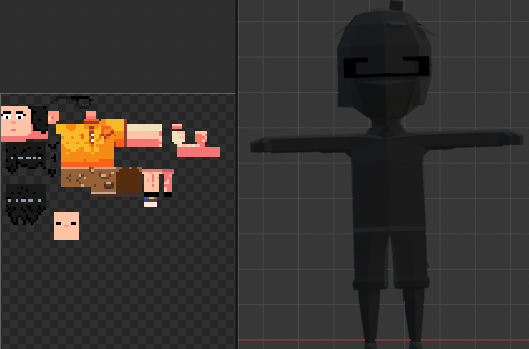
Importing Your Pixel Art
For 3D pixel art, a .png file (created in software like Aseprite) is ideal to maintain crisp edges and transparency. In the Shader Editor, press Shift + A and go to Texture -> Image Texture. Open your pixel art file.
On this node, you will see a dropdown set to Linear. This is the Texture Interpolation, which determines how pixels are blended.
- Linear: Blurs pixels together (bad for pixel art).
- Closest: Disables blurring, keeping every pixel sharp and square.
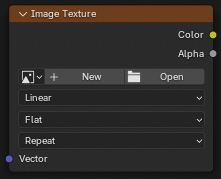
Switch this to Closest.
Creating a Constant Color (The Emission Trick)
If you connect your texture directly to the Base Color of the Principled BSDF, Blender’s lighting engine will add shadows and highlights. This often ruins pixel art by introducing colors outside of your carefully chosen palette. While a Toon Shader is an option, a simpler method for "unlit" pixel art is making the model a light source:
- Connect the Color output (yellow dot) of your Image Texture to the Emission Color input on the Principled BSDF.
- Set the Emission Strength to
1.0. This ensures the model "glows" with its own texture colors regardless of scene lighting. - Set the Base Color of the Principled BSDF to Black. Why? If the Base Color is light, it will still try to catch shadows. Setting it to black ensures only your emission (the pixel art) is visible.
Toon Shader uses a "Color Ramp" to create stepped shadows
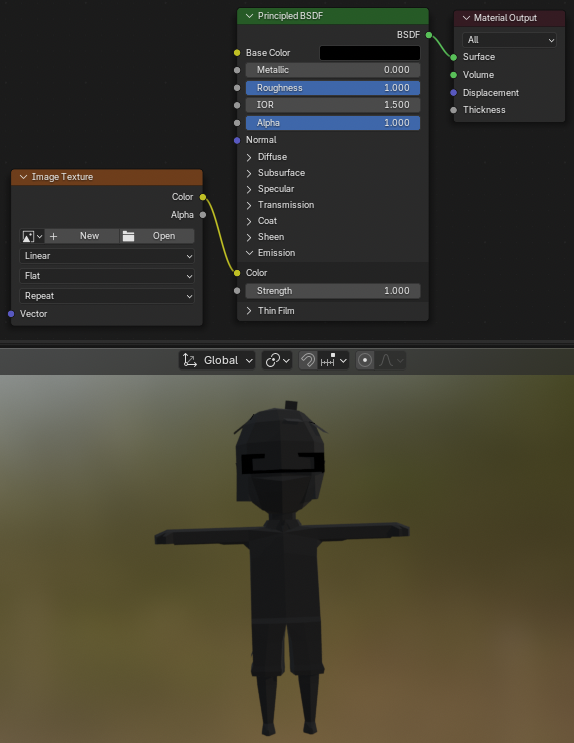
Now you got a completely black model as it has no texture (yet).
Mapping Pixels to Geometry
Now, open your sprite in the image texture and navigate to the UV Editing tab. By default, you have:
- Left Panel (UV Editor): Open your skin/texture image here.
- Right Panel (3D Viewport): Select your object's faces in Edit Mode.
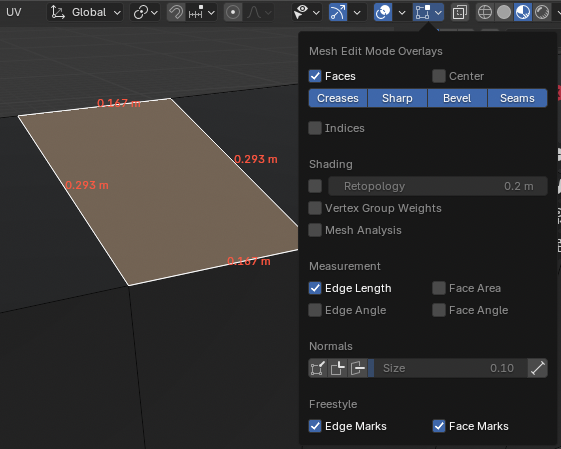
Press U to unwrap your geometry faces. In the UV Editor, you can move, scale, and rotate these "UV islands." To get that perfect 3D pixel look, you must snap your UV vertices to the pixel grid so that each 3D face aligns perfectly with the pixels on your texture.
It's useful to toggle the Edge Length overlay in the UV Editor - it’s super handy because it shows you the exact size of each UV edge, which lets you verify that your UVs match the pixel resolution you planned.
With Edge Length enabled, you can directly see whether a face is, say, 6 px × 12 px (or whatever your scale is), instead of eyeballing it. That makes snapping UV vertices to the pixel grid much more reliable and prevents subtle stretching or half-pixel offsets that break the crisp pixel-art look.
This surface dimension is , as I mentioned earlier, using the scale
1px=0.167m, which confirms the UV island is aligned to the intended pixel size.
You can model while painting the surfaces at the same time. A quick tip for reloading UV textures in Blender: just hit ⌘+R or Alt + R to reload the current image.
Adding Alpha
If you want to use transparency in your model, you first have to enable it by connecting the Alpha output of your Image Texture node directly to the Alpha input of the Principled BSDF. Without connecting these "dots," your model will remain 100% solid, and your texture's transparency data will be ignored.
However, while this direct connection looks perfect inside Blender, it often breaks when you export to a GLB for the web. Here is how it looks with and without proper settings:
When you connect Alpha directly, the GLB exporter defaults to Alpha Blending. This is fine for offline rendering, but on the web, it causes:
- Depth Sorting Glitches: The browser gets confused about which part of the object is in front. You’ll see the back of your model through the front, or parts will flicker and "pop" as you rotate the camera.
- Performance Hits: Mobile browsers struggle to render semi-transparent layers, leading to lag or crashes.
To fix the "weirdness," you must insert a Math (Greater Than) node between your Texture and the Principled BSDF.
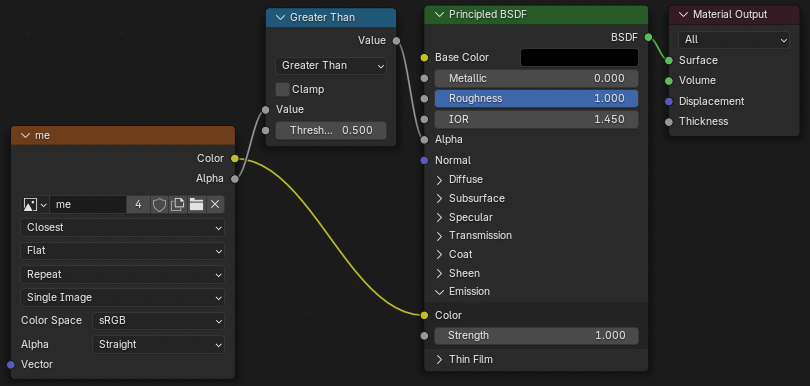
This node tells the GLB exporter to use MASK mode instead of BLEND. It converts your transparency into a simple binary: either the pixel is there (1) or it’s not (0).
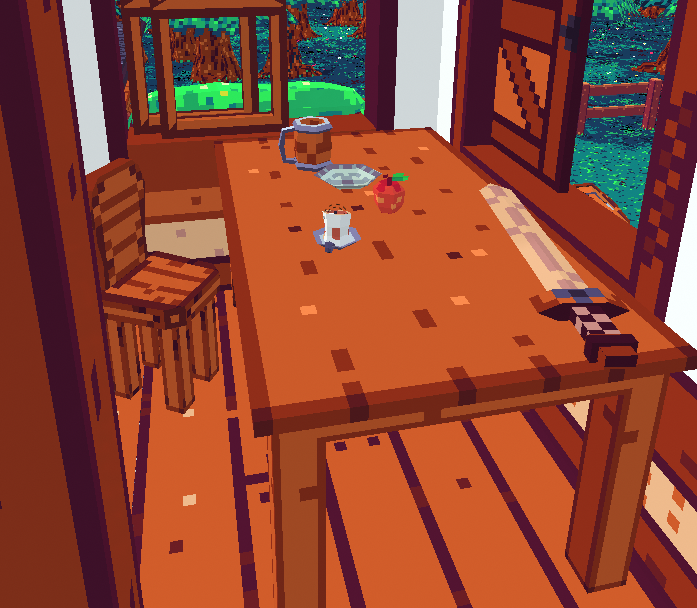
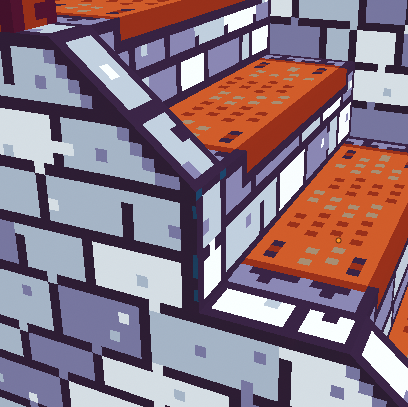
Examples
That is all you need to master the 3D Pixel aesthetic! Now, let your imagination run wild - you can create intricate objects, complex structures, and entire worlds using these settings.
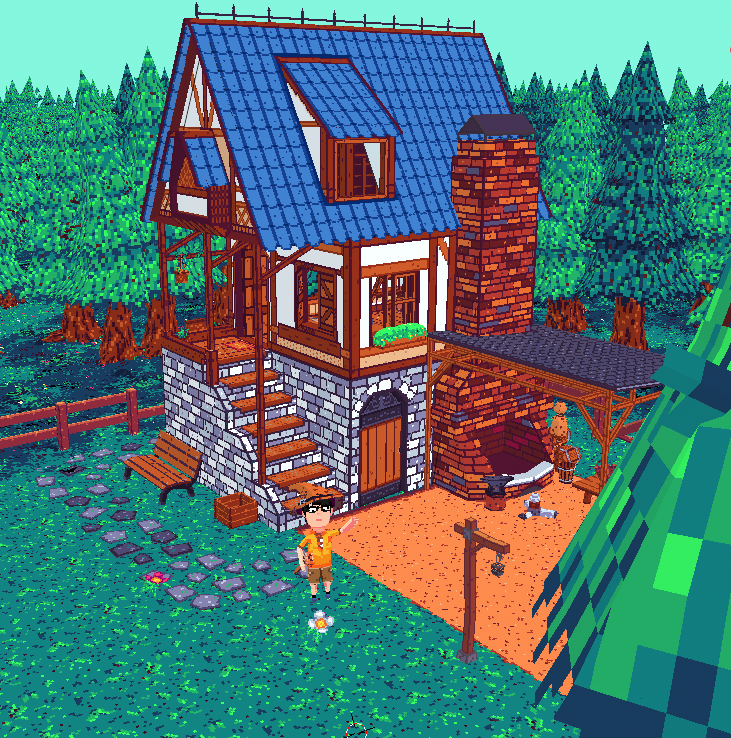
Tips: When working with slopes or curved edges, ensure you use consistent colors across all adjacent faces to prevent 'bleeding' or stray pixels. For the cleanest look, apply manual anti-aliasing along the edges to smooth the transition between the geometry and the pixel texture.
I also applied this exact 3D pixel model to a recent music video project. It was a great way to test the aesthetic's versatility in a dynamic environment, blending nostalgic pixel art with fluid 3D movement.
Finale
Thank you so much for reading! I hope this guide helps you kickstart your own 3D pixel art journey. This is just the beginning - stay tuned for future installments where I’ll dive deeper into modelling complex objects and sharing my animation workflow. I’m especially excited to show you how I handled the character rigging using Inverse Kinematics (IK) to get those smooth, expressive movements. Until next time, happy creating!
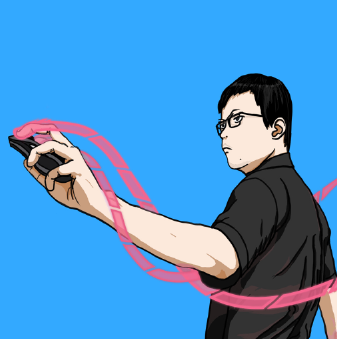
Table of contents
Join the discussion!

Nothing to preview yet. Start typing...